

学习要点:
1、url拼接
2、通过xpath helper获得xpath路径
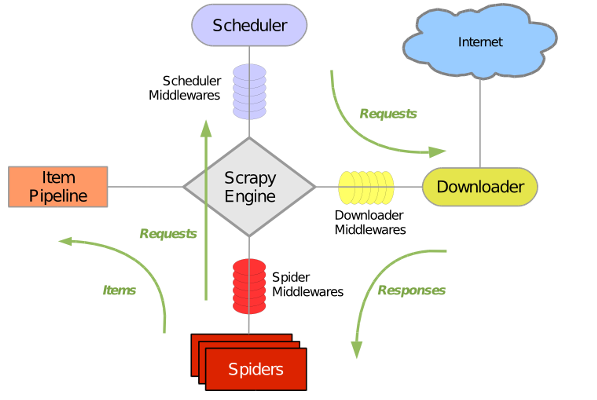
3、学习爬虫的整个流程,绿色的箭头代表数据流。
标记一下:
整理文章内文:
'/n'.join([p.text.strip() for p in soup.select('#artibody p')[:-1]])
一、创建项目
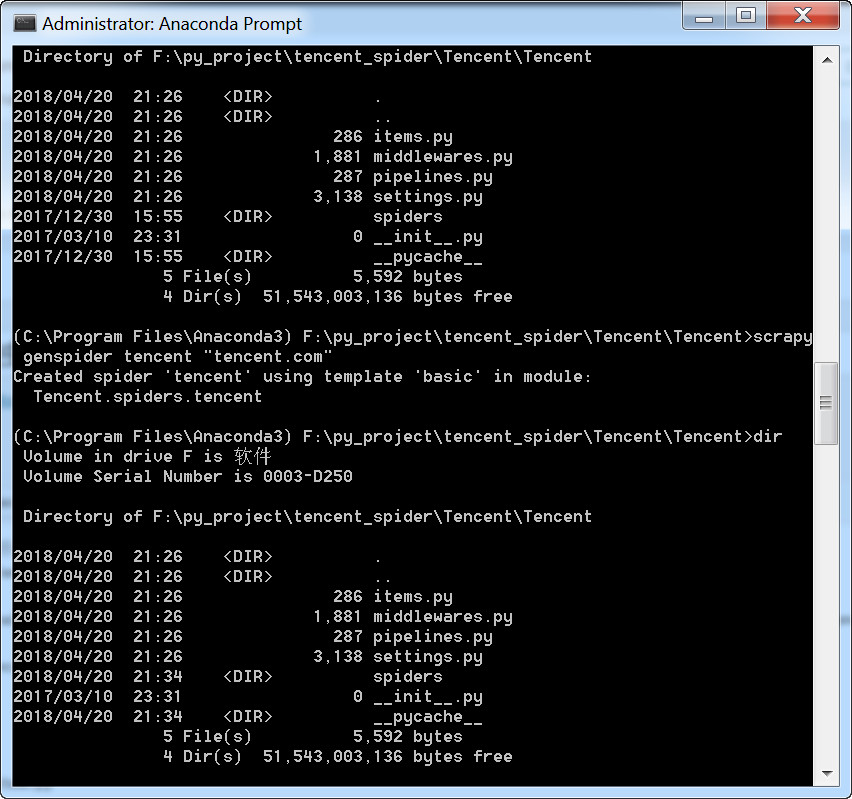
进入到要工作目录,执行scrapy startproject Tencent
二、创建爬虫
进入Tencent,再进入Tencent目录,运行以下命令,生成一个爬虫

注意:
这里的爬虫名称不能和项目名称相同,否则会报错:
Cannot create a spider with the same name as your project
上图中项目名称是“Tencent”,爬虫名称是“tencent”,大小写不同,所以才没有报错,不过建议项目名称用tencent,爬虫名称用tencentSpider这样的形式。
这里虽然是在\tencent\tencnet\目录下执行这个命令,但是创建的爬虫文件是直接保存到了spider目录下面。
三、设定item
用pycharm打开项目,修改item.py
class TencentItem(scrapy.Item):
    # define the fields for your item here like:
    # name = scrapy.Field()
    #职位名称
    positionName = scrapy.Field()
    #职位详情链接
    positionLink = scrapy.Field()
    #职位类别
    positionType = scrapy.Field()
    #招聘人数
    peopleNumber = scrapy.Field()
    #工作地点
    workLocation = scrapy.Field()
    #发布时间
    publishTime = scrapy.Field()
四、编写爬虫文件
在这一步,可以利用chrome的插件xpath helper选择节点的xpath路径。
蜗牛博客备注:
xpath可以在最新版本的chrome浏览器中使用,最好通过翻墙的方式,直接就可以安装。

import scrapy
from Tencent.items import TencentItem

class TencentSpider(scrapy.Spider):
    name = "tencent"
    allowed_domains = ["tencent.com"]
    baseUrl = "https://hr.tencent.com/position.php?&start="
    offset = 0
    start_urls = [baseUrl + str(offset)]
    #用来处理response
    def parse(self, response):
        node_list = response.xpath("//tr[@class='even'] | //tr[@class='odd']")

        for node in node_list:
            item = TencentItem()
            item['positionName']= node.xpath("./td[1]/a/text()").extract()[0]
            item['positionLink'] = node.xpath("./td[1]/a/@href").extract()[0]
            if len(node.xpath("./td[2]/text()")):
                item['positionType'] = node.xpath("./td[2]/text()").extract()[0]
            else:
                item['positionType'] = ""
            item['peopleNumber'] = node.xpath("./td[3]/text()").extract()[0]
            item['workLocation'] = node.xpath("./td[4]/text()").extract()[0]
            item['publishTime'] = node.xpath("./td[5]/text()").extract()[0]
            #yield的重要性,是返回数据后还能回来接着执行代码
            yield item
五、编写管道文件
处理spider返回的item数据
import json

class TencentPipeline(object):
    def __init__(self):
        self.f = open("tencent.json", "w")

    def process_item(self, item, spider):
        content = json.dumps(dict(item), ensure_ascii=False) + "\n"
        self.f.write(content)
        return item

    def close_spider(self, spider):
        self.f.close()
六、setting文件
启用pipeline,这一步非常简单,只需要将以下代码解除注释即可。
# Configure item pipelines
# See http://scrapy.readthedocs.org/en/latest/topics/item-pipeline.html
ITEM_PIPELINES = {
   'Tencent.pipelines.TencentPipeline': 300,
}
七、完善爬虫文件
在爬虫文件的末尾加入以下代码。
spider方法主要有两个:一个返回保存数据,一个返回需要继续爬取的页面请求,请求不需要我们处理,我们只要将请求构建好就可以了,发给引擎,引擎让调度器去重、入队列,交给下载器,下载器返回的响应文件,用callback处理。
        if self.offset <= 3939:
            self.offset += 10
            url = self.baseUrl + str(self.offset)
            yield scrapy.Request(url, callback=self.parse)
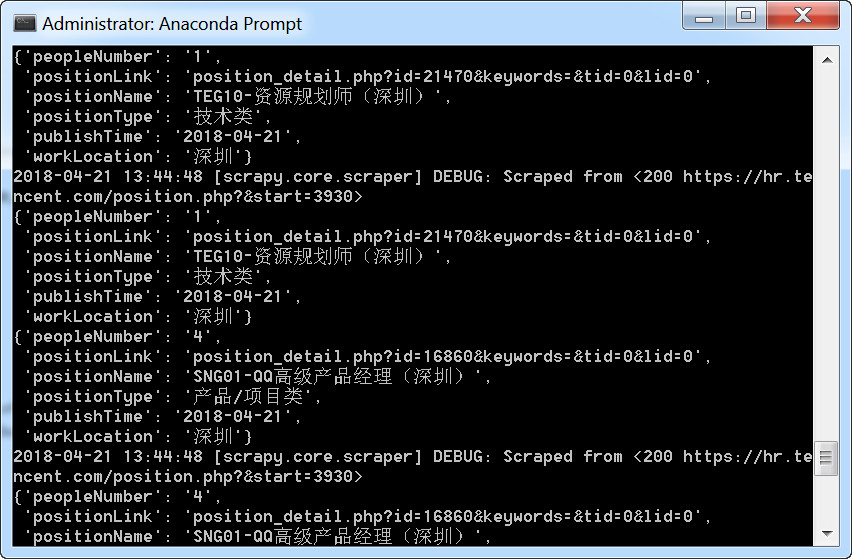
八、运行爬虫
九、第二种方法
将tencent.py末端代码改成下面这样:
        if len(response.xpath("//a[@class='noactive'  and @id='next']")) == 0:
            url = response.xpath("//a[@id='next']/@href").extract()[0]
            yield scrapy.Request("http://hr.tencent.com/" + url, callback=self.parse)
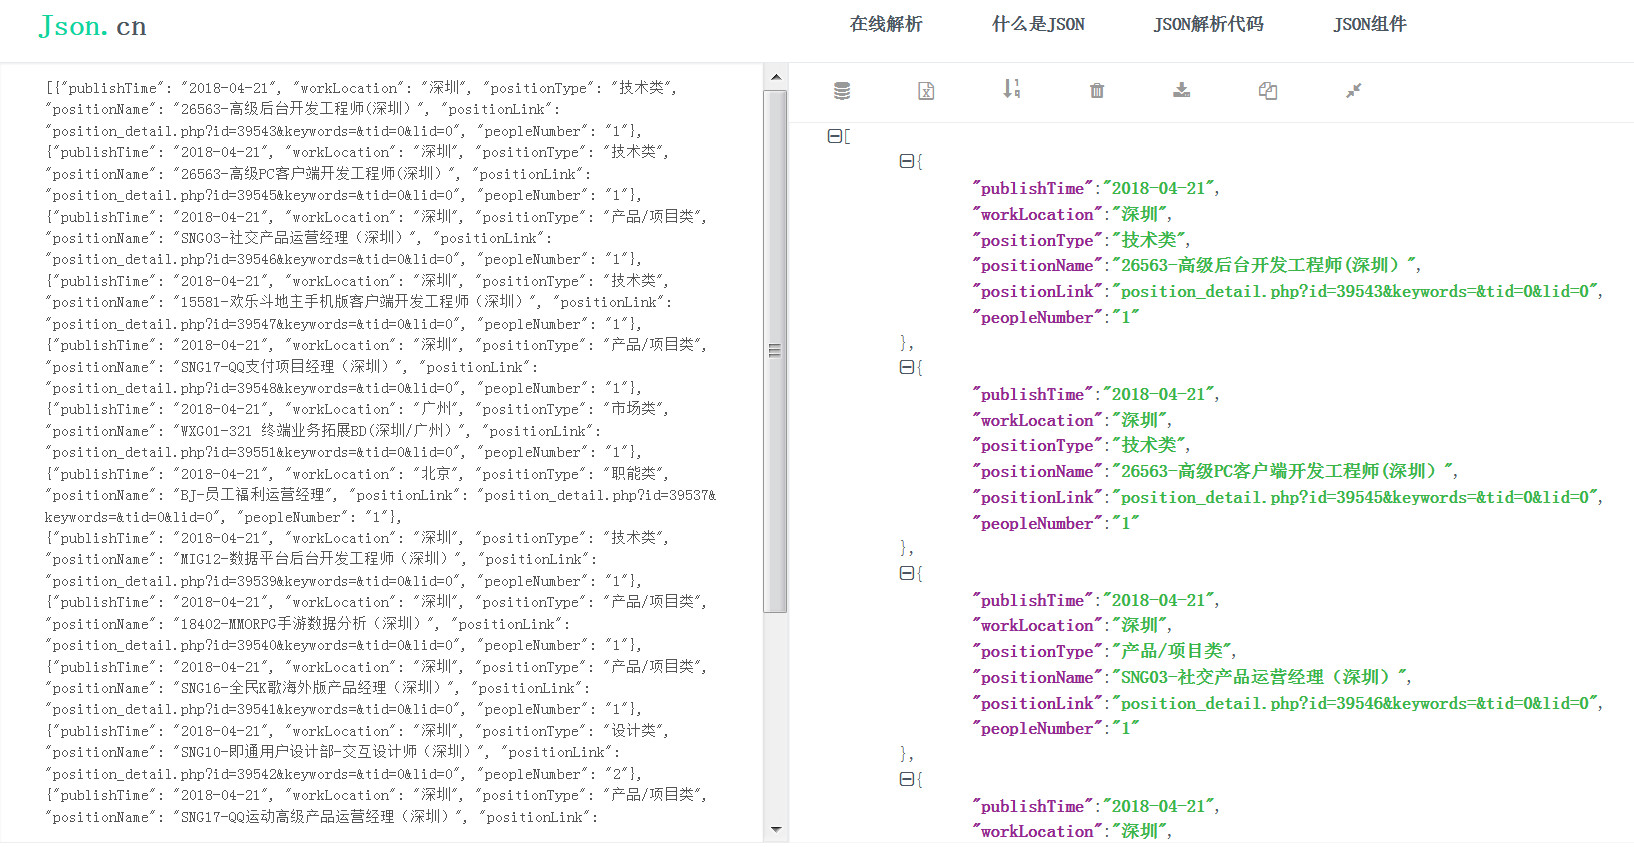
十、json文件
这样保存的json文件并不是标准的json格式,需要将末尾的逗号去掉,然后用中括号括起来,就可以在json.cn这样的JSON在线解析及格式化验证网站查看。
原载:蜗牛博客
网址:http://www.snailtoday.com
尊重版权,转载时务必以链接形式注明作者和原始出处及本声明。