
可以参考这里
一、申请API
https://home.openweathermap.org/api_keys
二、建立环境
首先在本地web文件夹下面建立一个项目文件平,然后执行以下的命令。
当然也可以直接用django创建,可是通过pythonhosted.org安装在我电脑会很慢。
pip install virtualenv
virtualenv weather_venv  #注意后面加个_env
cd weatherv_env/Scripts/
activate
cd..
cd..
三、建立django项目
1. 安装指定版本django
pip install django==2.0
#pip install django==2.0 -i https://pypi.douban.com/simple/
2.建立django APP
进入到项目文件夹,执行
django-admin startproject the_wedather
再进入这个the_wedather文件夹。(其实这一步不操作也可以的)
python manage.py startapp weather
然后在settings.py下面,新增这个app.
3.建立数据库。
执行下面的命令,就会在项目下生成一个sqlite的数据库。
python manage.py migrate
如果你想使用mysql作为数据库,那么先修改settings.py文件,再执行上面的命令。
DATABASES = {
    'default': {
        'ENGINE': 'django.db.backends.mysql',
        'NAME':  'jd',
        'USER': 'jd',
        'PASSWORD': '123456',
        'HOST': '127.0.0.1',
        'PORT': '3306',
    }
}
如果报错,Error loading MySQLdb module. Did you install mysqlclient
直接安装mysql-python也安装不上,建议安装pymql:
pip3 install pymysql
django项目__inti__.py中添加以下代码
import pymysql
pymysql.install_as_MySQLdb()
参考:https://blog.csdn.net/feiyanlhj/article/details/87342754
4.建立superuser
python manage.py createsuperuser

5.添加app
将app添加到settings.py中的INSTALLED_APPS里面。

6.测试
然后runserver看一下是否能看到首页。
python manage.py runserver
如果可以,就交给pycharm吧。
四、模板文件
1.在weather文件夹下面建立一个templates文件夹。
2.在templates文件夹下面建立一个weather文件夹,和app的名称一样。
3.将weather.html文件复制到这个文件夹。
weather
小提示:
关于模板的继承,请看这里
4. 修改url.py
from django.urls import path,include

urlpatterns = [
    path('admin/', admin.site.urls),
    path('', include('weather.urls')),
]
小提示:
这里原教程也有问题,weather.urls不加引号的话,会出现“NameError: name 'weather' is not defined”的出错提示。
5.在weather文件夹下面,建立一个urls.py
from django.urls import path
from . import views

urlpatterns = [
    path('',views.index),
]
6.修改weather文件夹下面的views.py
def index(request):
    return render(request,'weather/weather.html')
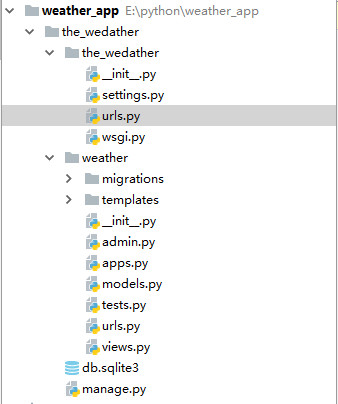
最后的文件夹结构是这样的:
7.修改模板文件
{% load staticfiles %}
<link rel="stylesheet" type="text/css" href="{%static 'css/bootstrap.css'%}" />
8.添加static路径
修改settings.py文件
这个还一定要加,虽说Django 默认会在 STATICFILES_DIRS中的文件夹 和 各app下的static文件夹中找文件。但是我试过不加就找不到静态文件。
STATICFILES_DIRS = (
    os.path.join(BASE_DIR, "static"),
)
成果展示:
9.如果要分页,请看这里
五、从API取数
1.测试API
修改views.py
import requests
from django.shortcuts import render

# Create your views here.
def index(request):
    url = 'http://api.openweathermap.org/data/2.5/weather?q={}&appid=这里填你的API key'
    city = 'New york'
    r = requests.get(url.format(city))
    print(r.text)
    return render(request,'weather/weather.html')
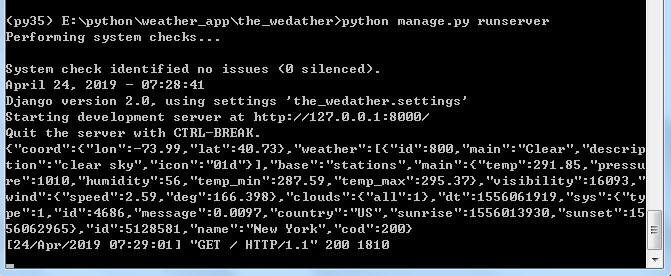
然后可以从终端看到取到的数。
2.取数
    r = requests.get(url.format(city)).json()

    city_weather = {
        'city':city,
        'temperature':r['main']['temp'],
        'description':r['weather'][0]['description'],
        'icon':r['weather'][0]['icon'],

    }
    print(city_weather)
然后可以在终端看到已经取到了数:

3.将数据传到模板
    content = {'city_weather':city_weather}
    return render(request,'weather/weather.html',content)
4.修改模板
<div class="box">
    <article class="media">
        <div class="media-left">
            <figure class="image is-50x50">
                <img src="http://openweathermap.org/img/w/{{ city_weather.icon }}.png" alt="Image">
            </figure>
        </div>
        <div class="media-content">
            <div class="content">
                <p>
                    <span class="title">{{ city_weather.city }}</span>
                    <br>
                    <span class="subtitle">{{ city_weather.temperature }}° F</span>
                    <br> {{ city_weather.description }}
                </p>
            </div>
        </div>
    </article>
</div>
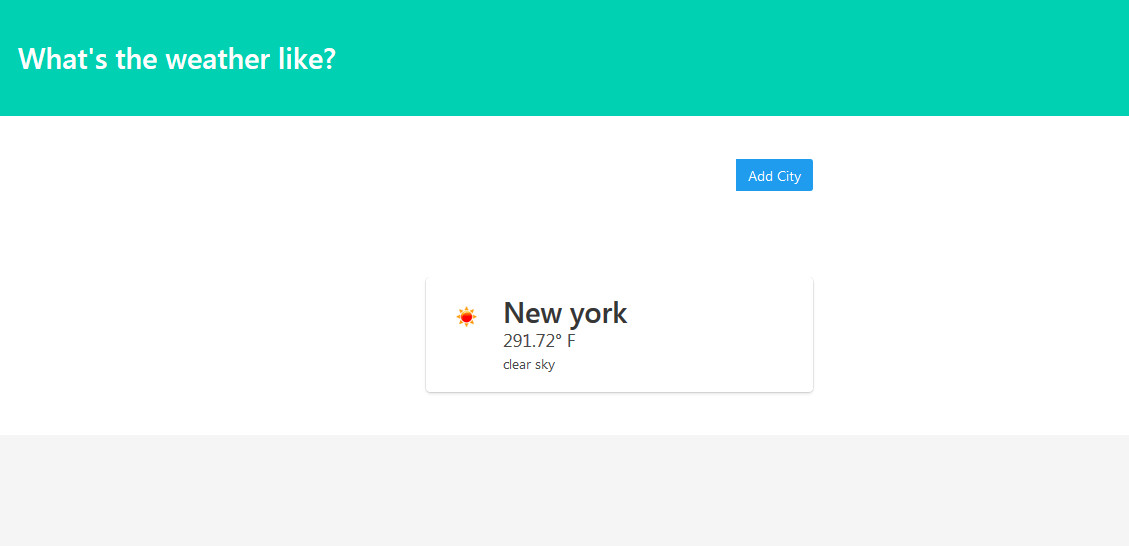
成果展示:
六、添加多城市功能
1.修改models.py
添加以下代码:
class city(models.Model):
    name = models.CharField(max_length = 25)

    def __str__(self):
        return self.name

    class Meta:
        verbose_name_plural = 'cities'
2.执行以下命令
python manage.py makemigrations
python manage.py migrate
备注:
如果先前设计好数据库的字段,后面又需要修改,可以先修改models,然后再执行上面的两条命令。不过如果数据库有数据,则可以通过两种方法解决:
1、新增加的字段,设置允许为空。生成表的时候,之前数据新增加的字段就会为空。(null=True允许数据库中为空,blank=True允许admin后台中为空)
2、新增加的字段,设置一个默认值。生成表的时候,之前的数据新增加字段就会应用这个默认值(default=None,默认值为空)
不过我使用了第二种方法,添加了一个“unique_id”字段,还是出现django.db.utils.IntegrityError: NOT NULL constraint failed: weather_hoursforecas
t.unique_id 的报错信息。
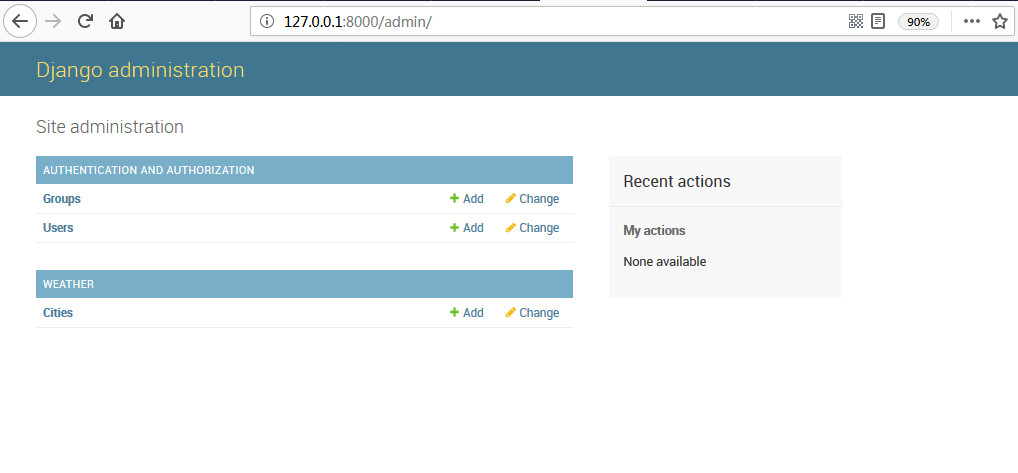
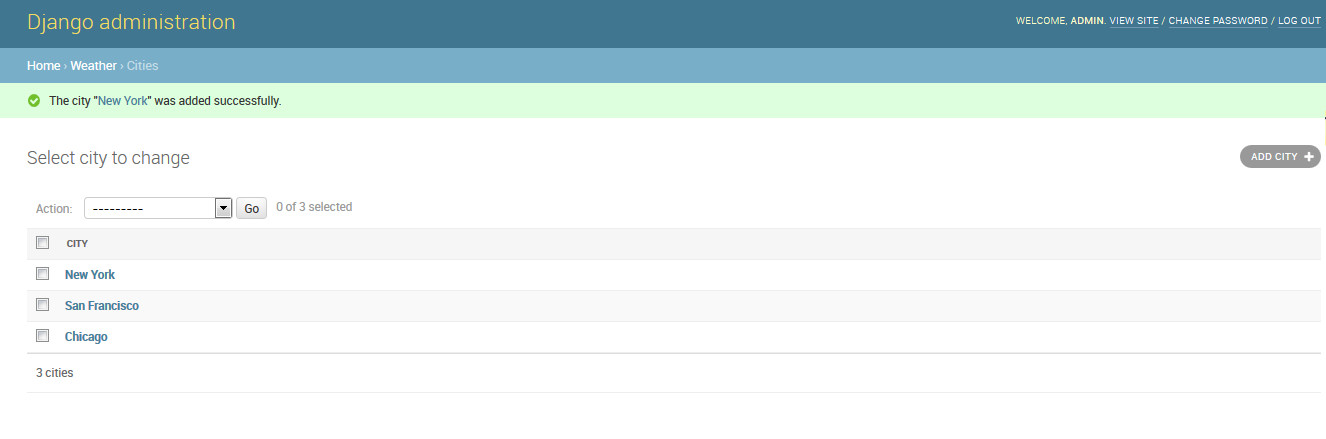
3.修改admin.py,在后台注册citys
from django.contrib import admin
from .models import city

admin.site.register(city)
然后进入后台就可以看到citys了。
4.添加几个城市
5.修改views.py
import requests
from django.shortcuts import render
from .models import City

# Create your views here.
def index(request):
    url = 'http://api.openweathermap.org/data/2.5/weather?q={}&appid=你的API'
    cities = City.objects.all()

    weather_data = []

    for city in cities:
        r = requests.get(url.format(city)).json()

        city_weather = {
            'city':city.name,
            'temperature':r['main']['temp'],
            'description':r['weather'][0]['description'],
            'icon':r['weather'][0]['icon'],

        }
        weather_data.append(city_weather)
    content = {'weather_data':weather_data}
    return render(request,'weather/weather.html',content)
6.在模板文件中加以下代码:
{% for city_weather in weather_data %}

{% endfor %}
成果展示:

七、添加“add city”功能
1.建立文件
在weather文件夹下面建立一个forms.py文件。
from django.forms  import ModelForm,TextInput
from .models import City

class Cityform(ModelForm):
    class Meta:
        model = City
        fields = ['name']
2.修改views.py
from .forms import Cityform
    if request.method =='POST':
        pass

    form = Cityform()
content = {'weather_data':weather_data,'form':form}
widgets = {'name':TextInput(attrs={'class':'input','placeholder':'City Name'})}
3.修改模板文件:
    </section>
    <section class="section">
        <div class="container">
            <div class="columns">
                <div class="column is-offset-4 is-4">
                    <form method="POST">
                        {% csrf_token %}
                        <div class="field has-addons">
                            <div class="control is-expanded">
                                {{ form.name }}
                            </div>
                            <div class="control">
                                <button type="submit" class="button is-info">
                                    Add City
                                </button>
                            </div>
                        </div>
                    </form>
                </div>
            </div>
        </div>
    </section>
4.修改views.py,保存添加的城市。
最终的views.py代码如下:
import requests
from django.shortcuts import render
from .models import City
from .forms import Cityform

# Create your views here.
def index(request):
    url = 'http://api.openweathermap.org/data/2.5/weather?q={}&appid=你的API'
    cities = City.objects.all()

    if request.method =='POST':
        form = Cityform(request.POST)
        form.save()

    form = Cityform()

    weather_data = []

    for city in cities:
        r = requests.get(url.format(city)).json()

        city_weather = {
            'city':city.name,
            'temperature':r['main']['temp'],
            'description':r['weather'][0]['description'],
            'icon':r['weather'][0]['icon'],

        }
        weather_data.append(city_weather)
    content = {'weather_data':weather_data,'form':form}
    return render(request,'weather/weather.html',content)
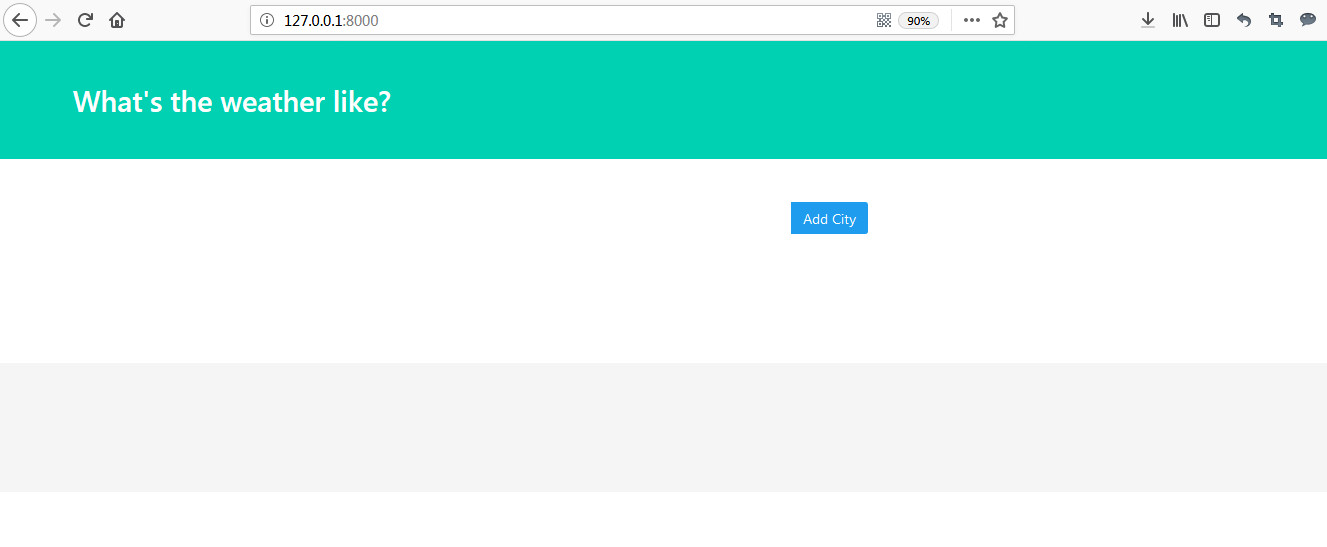
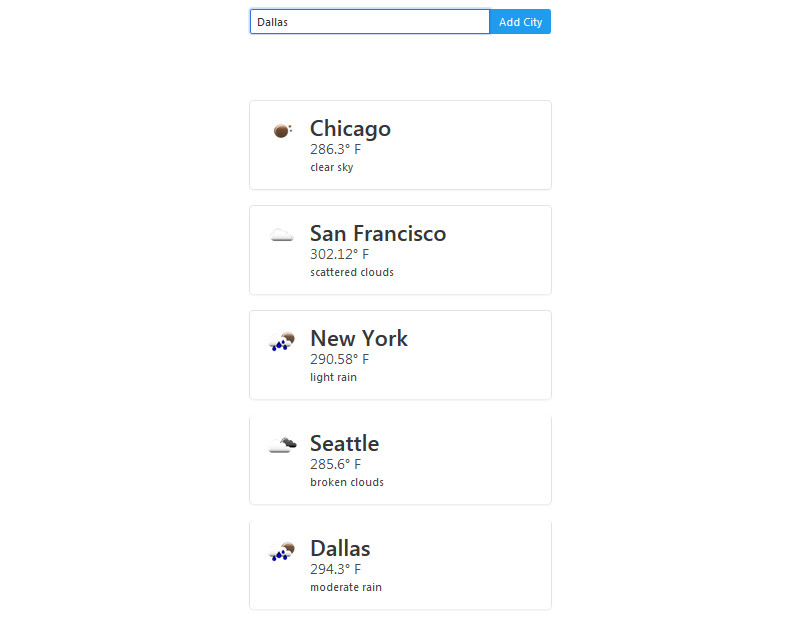
这时就可以通过“add city”按钮添加城市了。
https://www.youtube.com/watch?v=qCQGV7F7CUc
十五、另一个天气app
https://www.youtube.com/watch?v=46VQvy1gp-4
为什么我五.4之后没有显示 纽约 天气温度那一块
看一下出错提示是什么。