本文的前半部分请参看蜗牛博客的:
第八步:Single.php
Single.php是发布文章的模板,用来控制文章页面的布局,看看它的代码是不是有似曾相似的感觉?因为它与我们前面学过的index.php文件中的代码非常相似。不同的是我们加入了评论模板的 div。
<?php get_header(); ?>
<div id="blog">
<?php if(have_posts()) : ?><?php while(have_posts()) : the_post(); ?>
<div class="post">
<h3><a href="<?php the_permalink(); ?>"><?php the_title(); ?></a></h3>
<div class="entry">
<?php the_post_thumbnail(); ?>
<?php the_content(); ?>
<p class="postmetadata">
<?php _e('Filed under:'); ?> <?php the_category(', ') ?> <?php _e('by'); ?> <?php the_author(); ?><br />
<?php comments_popup_link('No Comments »', '1 Comment »', '% Comments »'); ?> <?php edit_post_link('Edit', ' | ', ''); ?>
</p>
</div>
<div class="comments-template">
<?php comments_template(); ?>
</div>
</div>
<?php endwhile; ?>
<div class="navigation">
<?php previous_post_link('< %link') ?> <?php next_post_link(' %link >') ?>
</div>
<?php endif; ?>
</div>
<?php get_sidebar(); ?>
<?php get_footer(); ?>
第九步:Comments.php
将以下代码加入到Comments.php。

<?php comment_form(); ?>
第十步:Page.php
当我们在Wordpress新建一个页面的时候,page.php就是控制页面布局与结构的文件,除了没有文章评论的功能外,它的代码与single.php几乎是完全一样的。
<?php get_header(); ?>
<div id="blog">
<?php if(have_posts()) : ?><?php while(have_posts()) : the_post(); ?>
<div class="post">
<h3><a href="<?php the_permalink(); ?>"><?php the_title(); ?></a></h3>
<div class="entry">
<?php the_content(); ?>
<p class="postmetadata">
<?php _e('Filed under:'); ?> <?php the_category(', ') ?> <?php _e('by'); ?> <?php the_author(); ?><br />
<?php comments_popup_link('No Comments »', '1 Comment »', '% Comments »'); ?> <?php edit_post_link('Edit', ' | ', ''); ?>
</p>
</div>
</div>
<?php endwhile; ?>
<div class="navigation">
<?php posts_nav_link(); ?>
</div>
<?php endif; ?>
</div>
<?php get_sidebar(); ?>
<?php get_footer(); ?>
第十一步:Category.php
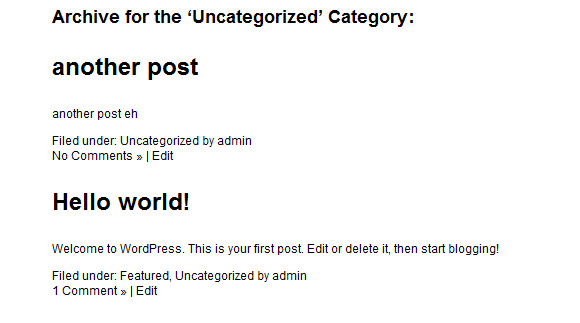
Category.php是当我们以文章目录、作者、时间浏览时起作用的一个文件,除了开头的部分代码,它与single.php文件的代码是一样的。
<?php get_header(); ?>
<div id="blog">
<?php if(have_posts()) : ?><?php while(have_posts()) : the_post(); ?>
<?php $post = $posts[0]; // Hack. Set $post so that the_date() works. ?>
<?php /* If this is a category archive */ if (is_category()) { ?>
<h2>Archive for the ‘<?php single_cat_title(); ?>’ Category:</h2>
<?php /* If this is a tag archive */ } elseif( is_tag() ) { ?>
<h2>Posts Tagged ‘<?php single_tag_title(); ?>’</h2>
<?php /* If this is a daily archive */ } elseif (is_day()) { ?>
<h2>Archive for <?php the_time('F jS, Y'); ?>:</h2>
<?php /* If this is a monthly archive */ } elseif (is_month()) { ?>
<h2>Archive for <?php the_time('F, Y'); ?>:</h2>
<?php /* If this is a yearly archive */ } elseif (is_year()) { ?>
<h2>Archive for <?php the_time('Y'); ?>:</h2>
<?php /* If this is an author archive */ } elseif (is_author()) { ?>
<h2>Author Archive</h2>
<?php /* If this is a paged archive */ } elseif (isset($_GET['paged']) && !empty($_GET['paged'])) { ?>
<h2>Blog Archives</h2>
<?php } ?>
<div class="post">
<h3><a href="<?php the_permalink(); ?>"><?php the_title(); ?></a></h3>
<div class="entry">
<?php the_content(); ?>
<p class="postmetadata">
<?php _e('Filed under:'); ?> <?php the_category(', ') ?> <?php _e('by'); ?> <?php the_author(); ?><br />
<?php comments_popup_link('No Comments »', '1 Comment »', '% Comments »'); ?> <?php edit_post_link('Edit', ' | ', ''); ?>
</p>
</div>
</div>
<?php endwhile; ?>
<div class="navigation">
<?php posts_nav_link(); ?>
</div>
<?php endif; ?>
</div>
<?php get_sidebar(); ?>
<?php get_footer(); ?>
下面这段代码就是它与Single.php不同的地方。
<?php $post = $posts[0]; // Hack. Set $post so that the_date() works. ?>
<?php /* If this is a category archive */ if (is_category()) { ?>
<h2>Archive for the ‘<?php single_cat_title(); ?>’ Category:</h2>
<?php /* If this is a tag archive */ } elseif( is_tag() ) { ?>
<h2>Posts Tagged ‘<?php single_tag_title(); ?>’</h2>
<?php /* If this is a daily archive */ } elseif (is_day()) { ?>
<h2>Archive for <?php the_time('F jS, Y'); ?>:</h2>
<?php /* If this is a monthly archive */ } elseif (is_month()) { ?>
<h2>Archive for <?php the_time('F, Y'); ?>:</h2>
<?php /* If this is a yearly archive */ } elseif (is_year()) { ?>
<h2>Archive for <?php the_time('Y'); ?>:</h2>
<?php /* If this is an author archive */ } elseif (is_author()) { ?>
<h2>Author Archive</h2>
<?php /* If this is a paged archive */ } elseif (isset($_GET['paged']) && !empty($_GET['paged'])) { ?>
<h2>Blog Archives</h2>
<?php } ?>
第十二步:设定背景、Feed Links
从Wordpress 3.0 开始,Wordpress支持自定义背景的功能,既可以使用图片作为背景,也可以使用颜色作为背景,而你所要做的只要在functions.php加入以下一行代码即可。

//Code for custom background support
add_custom_background();
然后我们再增加feed功能,将以下代码加入functions.php。
//Enable post and comments RSS feed links to head
add_theme_support( 'automatic-feed-links' );
第十三步:Footer.php
最后一步是建立footer.php文件,直接使用我们在style.CSS文件中定义的#footer,再加上版权信息,以及FEED的链接。
<div id="footer">
    <p>
    <strong>Copyright 2011 <?php bloginfo('name'); ?> | All Rights Reserved.</strong> </a>
    Designed by <a href="http://slackrmedia.com">SlackrMedia</a>
    </p>
    <p><a href="<?php bloginfo('rss2_url'); ?>">Latest Stories RSS</a> | <a href="<?php comments_rss_link('comment feed'); ?>">Comments RSS</a></p>
    </div>
</div>

</body>
</html>
第十四步:其他功能
以下这些功能你不一定用到,但是非常有用。首先,我们介绍如何在一个wordpress里面同时运行多个博客,只需要将以下代码加入到functions.php。
//Enable multisite feature (WordPress 3.0)
define('WP_ALLOW_MULTISITE', true);
最后提示一下:你可以在这儿下载本教程中的所有模板文件
http://www.snailtoday.com/myimg/wordPress-theme.rar
结论:
到此,蜗牛博客的《怎样利用复制/粘贴制作WordPress模板》教程就结束了,通过复制、贴粘的方法,你也可以制作出一个模板,是不是?当然,这个只是非常简单的模板,你可以通过自己的修改,使这个模板更加美观。
在下一节的教程中,蜗牛博客将会教你给模板制作一个管理面板,请你随时留意蜗牛博客(http://www.snailtoday.com)。


