
一、7行代码启动wagtail
(一)创建虚拟环境,请看这里
(二)执行代码
pip install wagtail
wagtail start mysite
cd mysite
pip install -r requirements.txt

#先修改数据库为MySQL
python manage.py migrate
python manage.py createsuperuser
python manage.py runserver
二、预览效果
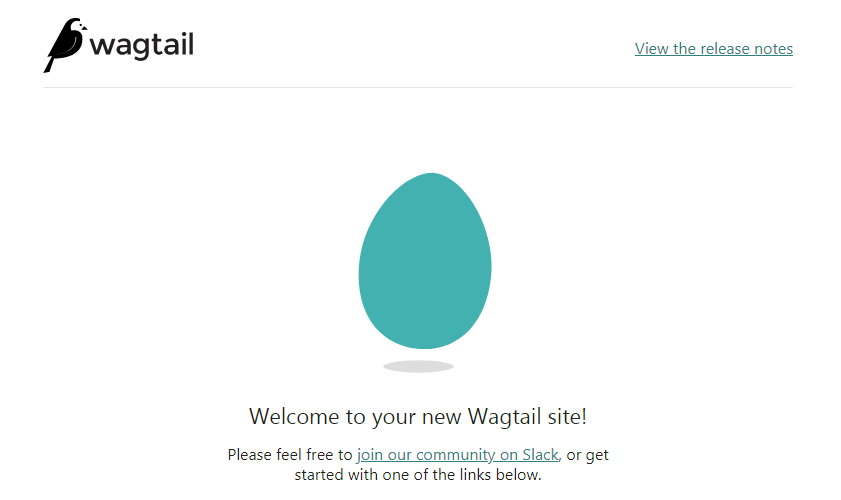
不过进入到wagtail的后台,发现这软件的设计理念很特殊,一点也不人性化。
反正我进入到后台根本不知道如何发布一篇文章。
三、新建app
(一)执行代码
python manage.py startapp blog
(二)将"blog"加入到settings.py中的installed apps中去。
(三)将blog app下面的models改成
from django.db import models

from wagtail.core.models import Page
from wagtail.core.fields import RichTextField
from wagtail.admin.edit_handlers import FieldPanel
from wagtail.search import index


# Keep the definition of BlogIndexPage, and add:

class BlogIndexPage(Page):
    pass


class BlogPage(Page):
    date = models.DateField("Post date")
    intro = models.CharField(max_length=250)
    body = RichTextField(blank=True)

    search_fields = Page.search_fields + [
        index.SearchField('intro'),
        index.SearchField('body'),
    ]

    content_panels = Page.content_panels + [
        FieldPanel('date'),
        FieldPanel('intro'),
        FieldPanel('body', classname="full"),
    ]
(四)生成数据库
python manage.py makemigrations
python manage.py migrate
四、新建页面
(一)下面提wagtail的模板形式。
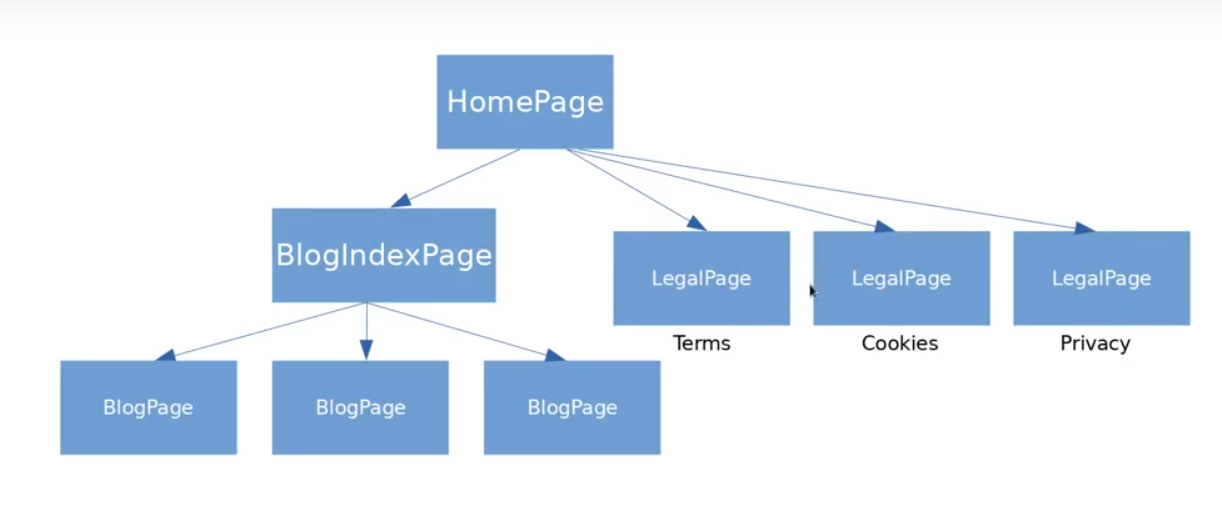
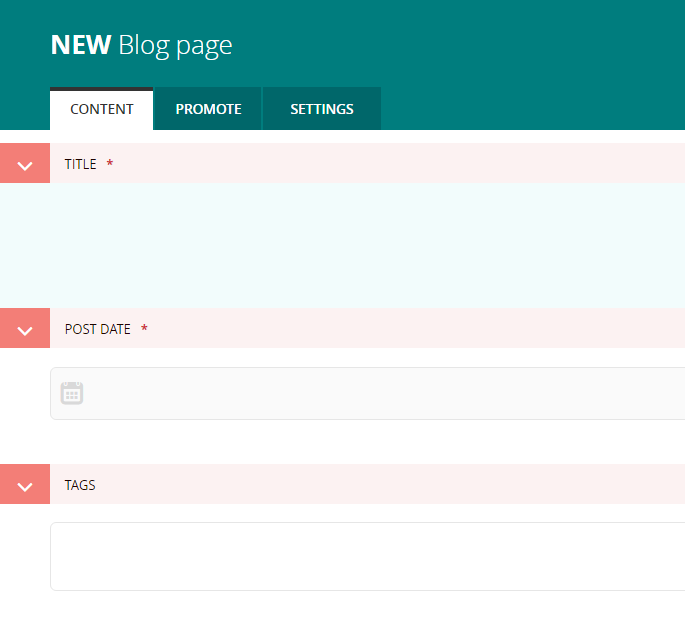
(二)在wagtail的后台,点击“add child page”,
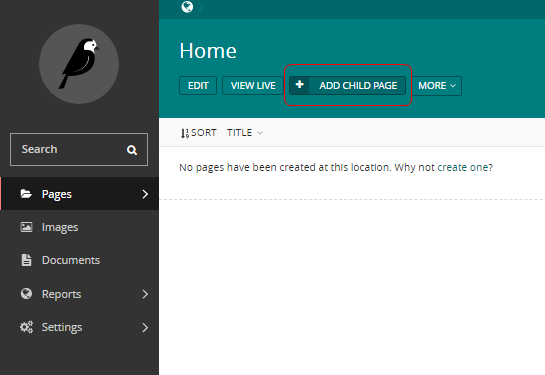
(三)然后再选择“blog index page”
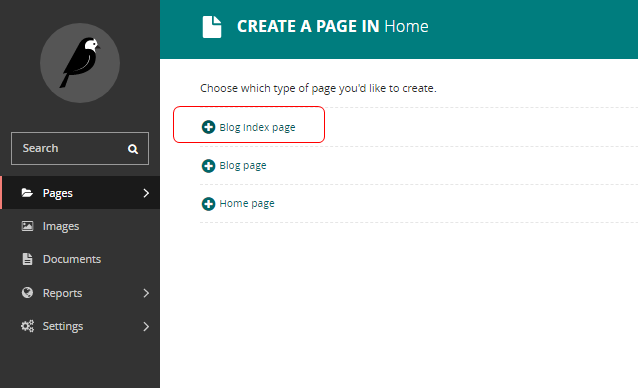
(四)然后在“blog index page”下面建立blog page页面。
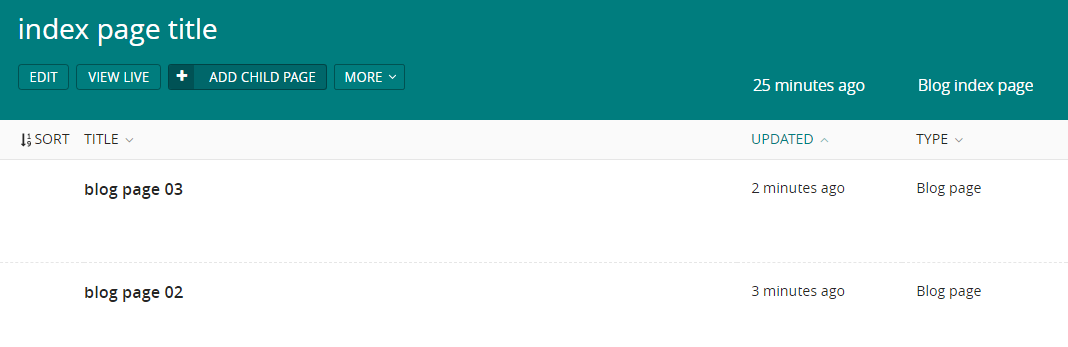
这时虽然建立了页面,可是如果访问的话是无法访问的,因为还没有建立模板。
五、建立模板
在blog 下面建立templates\blog\blog_page.html、
{% extends "base.html" %}
{% load wagtailcore_tags %}
{% block body_class %}template-blogpage{% endblock %}
{% block content %}
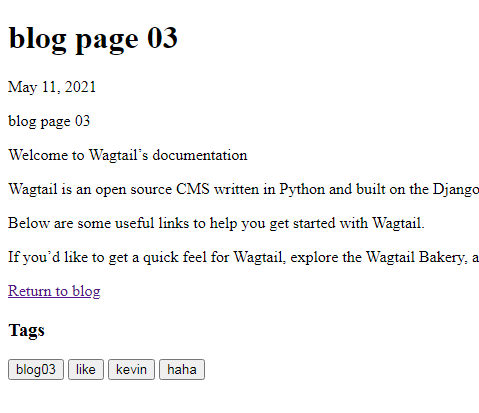
<h1>{{ page.title }}</h1>
<p class="meta">{{ page.date }}</p>
<div class="intro">{{ page.intro }}</div>
{{ page.body|richtext }}
<p><a href="{{ page.get_parent.url }}">Return to blog</a></p>
{% endblock %}
再建立templates\blog\blog_index_page.html
{% extends "base.html" %}

{% load wagtailcore_tags %}

{% block body_class %}template-blogindexpage{% endblock %}

{% block content %}
    <h1>{{ page.title }}</h1>

    <div class="intro">{{ page.intro|richtext }}</div>

    {% for post in page.get_children %}
        <h2><a href="{% pageurl post %}">{{ post.title }}</a></h2>
        {{ post.specific.intro }}
        {{ post.specific.body|richtext }}
    {% endfor %}

{% endblock %}
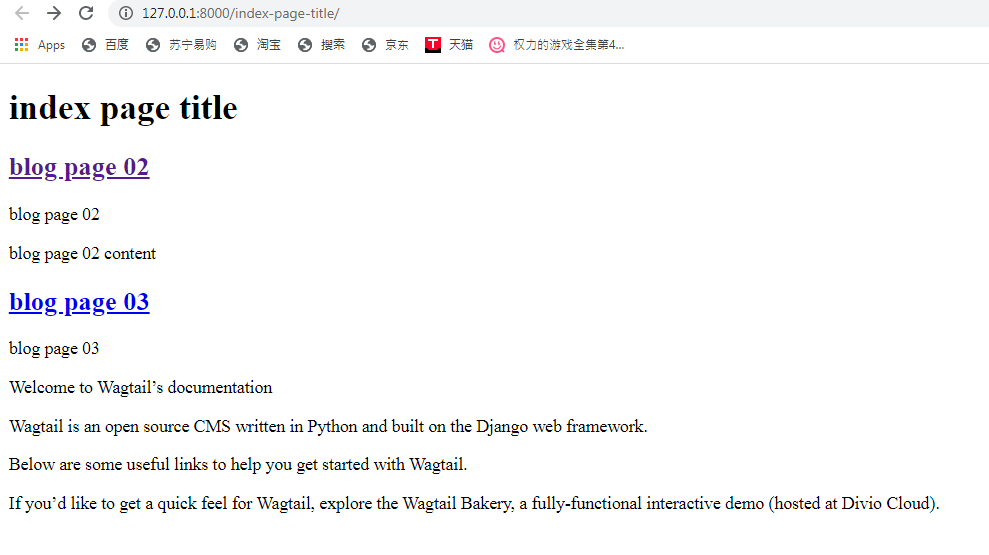
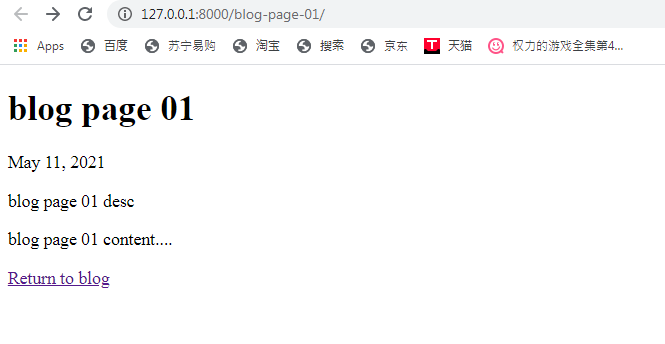
六、访问页面
这时再访问页面,就可以正常显示了。
列表页:
详情页:
七、添加tags
(一)直接修改models
其中的BlogPageTag里面的参数“BlogPage”就是你要添加tags的class.
from django.db import models

# New imports added for ClusterTaggableManager, TaggedItemBase, MultiFieldPanel

from modelcluster.fields import ParentalKey
from modelcluster.contrib.taggit import ClusterTaggableManager
from taggit.models import TaggedItemBase

from wagtail.core.models import Page, Orderable
from wagtail.core.fields import RichTextField
from wagtail.admin.edit_handlers import FieldPanel, InlinePanel, MultiFieldPanel
from wagtail.images.edit_handlers import ImageChooserPanel
from wagtail.search import index


# ... (Keep the definition of BlogIndexPage)


class BlogPageTag(TaggedItemBase):
    content_object = ParentalKey(
        'BlogPage',
        related_name='tagged_items',
        on_delete=models.CASCADE
    )


class BlogPage(Page):
    date = models.DateField("Post date")
    intro = models.CharField(max_length=250)
    body = RichTextField(blank=True)
    tags = ClusterTaggableManager(through=BlogPageTag, blank=True)

    # ... (Keep the main_image method and search_fields definition)

    content_panels = Page.content_panels + [
        MultiFieldPanel([
            FieldPanel('date'),
            FieldPanel('tags'),
        ], heading="Blog information"),
        FieldPanel('intro'),
        FieldPanel('body'),
    ]
(三)
这时进入到后台刷新,就可以看到新建页面的地方可以添加tags了。
(四)数据库迁移
这时点击修改原来存在的页面会报错,
ProgrammingError at /admin/pages/9/edit/
(1146, "Table 'png04.blog_blogpagetag' doesn't exist")
再次执行上面的2次数据库迁移命令。
(五)修改模板
在模板中添加
{% if page.tags.all.count %}
    <div class="tags">
        <h3>Tags</h3>
        {% for tag in page.tags.all %}
            <a href="{% slugurl 'tags' %}?tag={{ tag }}"><button type="button">{{ tag }}</button></a>
        {% endfor %}
    </div>
{% endif %}
(六)效果预览
现在虽然可以显示tags,但是它的链接是不正确的,还要继续修改。
(七)添加tags的class
class BlogTagIndexPage(Page):

    def get_context(self, request):

        # Filter by tag
        tag = request.GET.get('tag')
        blogpages = BlogPage.objects.filter(tags__name=tag)

        # Update template context
        context = super().get_context(request)
        context['blogpages'] = blogpages
        return context
(八)后台添加模板
在后台home下面,添加一个tags page(即与Blog index平级),模板为BlogTagIndexPage,并设定它的slug为tags。
(九)建立模板
建立一个blog/blog_tag_index_page.html 模板文件,加入以下代码
{% extends "base.html" %}
{% load wagtailcore_tags %}
{% block content %}
{% if request.GET.tag|length %}
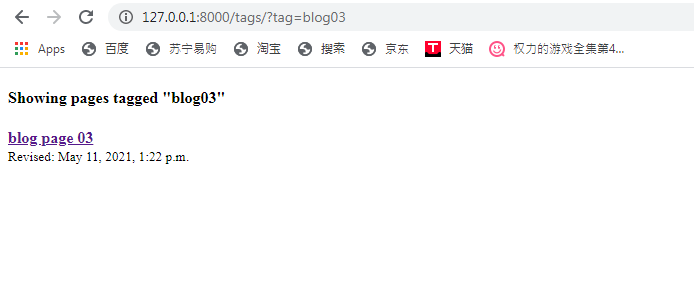
<h4>Showing pages tagged "{{ request.GET.tag }}"</h4>
{% endif %}
{% for blogpage in blogpages %}
<p>
<strong><a href="{% pageurl blogpage %}">{{ blogpage.title }}</a></strong><br />
<small>Revised: {{ blogpage.latest_revision_created_at }}</small><br />
{% if blogpage.author %}
<p>By {{ blogpage.author.profile }}</p>
{% endif %}
</p>
{% empty %}
No pages found with that tag.
{% endfor %}
{% endblock %}
(十)最终的效果
八、存在的问题
修改了models.py之后,后台的页面模板无法删除,原来的页面也无法访问。
参考:
https://www.youtube.com/watch?v=plggtgoQjcs
https://docs.wagtail.io/en/v2.7.1/getting_started/tutorial.html
tags可参考:https://www.youtube.com/watch?v=RdWjLAmczJQ